How to Repair a Leaky Faucet
Leaky faucets are more than just a nuisance; they can lead to higher water bills and potential damage to your sink or countertop. Leaky bathroom faucets are particularly prevalent, and addressing them promptly is crucial to prevent wasted water and potential damage.
While learning how to repair a leaky faucet yourself can save time and money, there are times when it’s best to call a professional plumber.
This guide will walk you through the steps to fix a leaky faucet and help you recognize when it might be time to bring in an expert.
Understanding the Different Types of Faucets
This guide will walk you through the steps to fix a leaky faucet and help you recognize when it might be time to bring in drain cleaning and repair.
- Compression Faucets: Most leaky compression faucets, found in older homes, have separate hot and cold handles. Leaky compression faucets usually require a new seat washer.
- Cartridge Faucets: Common in modern homes, these use a cartridge to control water flow. A leaky cartridge faucet often needs the cartridge replaced.
- Ball Faucets: Typically found in kitchens, these have a single handle that controls both temperature and flow. Ball faucets have several small parts, including washers and O-rings, that may need replacement. Ensuring that replacement parts fit correctly is crucial to prevent leaks.
- Ceramic Disk Faucets: Durable and modern, these can develop leaks due to worn neoprene seals or disk cylinders.
Tools and Materials You’ll Need
To fix a leaky faucet, gather the following tools and materials, and consider hydro jetting for severe mineral scale:
- Adjustable Wrench: For loosening and tightening nuts and bolts.
- Needle Nose Pliers: Useful for removing small parts like O-rings.
- Crescent Wrench: Ideal for gripping and turning the valve stem.
- Duct Tape: To cover the jaws of your wrench to avoid scratching the faucet’s surface.
- Plumber’s Grease: To lubricate O-rings and other moving parts.
- New O-rings, Washers, and Cartridges: These can be purchased at your local hardware store.
- Soft Scouring Pad and Distilled White Vinegar: For cleaning mineral deposits.
- Flathead and Phillips Screwdrivers: For removing screws and caps.
Step-by-Step Guide to Fix a Leaky Faucet and Replace the Valve Seat
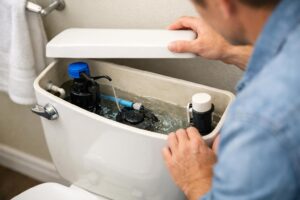
- Shut Off the Water: Turn off the water supply using the valves under the sink. If these are not available, shut off the main water supply.
- Plug the Drain: Use duct tape or a stopper to prevent small parts from falling into the drain.
- Identify the Faucet Type: Remove any caps or handles to reveal the internal components. For many faucets, you will need to pry off the decorative cap to access the handle screw. Determine if you have a compression, cartridge, ball, or ceramic disk faucet.
Disassemble the Faucet:
- Compression Faucet: Remove the packing nut with a wrench, then replace the seat washer. Check the valve seat for wear and replace it if necessary.
- Cartridge Faucet: Remove the handle screw, replace the old cartridge, and check the O-ring.
- Ball Faucet: Use a special tool to replace the ball assembly, valve seat, springs, and O-rings.
- Ceramic Disk Faucet: Remove the handle and screws, replace the neoprene seals, and clean the disks.
- Clean Parts: Clean any mineral deposits or grime using white vinegar and a soft pad.
- Reassemble the Faucet: Put the faucet back together, tightening parts securely but not too tightly.
- Turn the Water On: Slowly turn the water back on and check for leaks. If the faucet still leaks, consider calling Water Line Repair.
Leaky Cartridge Faucet: How to Fix It
To fix a leaky faucet, gather the following tools and materials, and consider hydro jetting for severe mineral scale:
Signs of a Leaky Cartridge Faucet
If you notice water dripping from the spout even when the faucet is off, or if there’s water pooling around the base, you likely have a leaky cartridge faucet.
Quick Fix for a Leaky Cartridge Faucet
- Shut Off the Water: Before starting, turn off the water supply to the faucet to prevent any spills.
- Remove the Handle: Use a screwdriver to take off the handle, exposing the cartridge inside.
- Replace the Cartridge: Pull out the old cartridge and replace it with a new one. Make sure it’s positioned correctly.
- Reassemble the Faucet: Put the handle back on and tighten the screw. Then, turn the water supply back on and check for leaks.
Leaky Compression Faucets: Quick Fixes
Leaky compression faucets, which have separate hot and cold handles, are standard in older homes. They tend to leak when the rubber washer inside wears out.
Causes of Leaky Compression Faucets
Worn-Out Washer: The most common reason for leaks is a worn washer that no longer seals properly.
Loose Parts: A loose packing nut or handle can cause leaks.
How to Fix a Leaky Compression Faucet
Turn Off the Water: Shut off the water supply to the faucet.
Replace the Washer: Remove the faucet handle, take out the old washer, and replace it with a new one.
Check for Leaks: Reassemble the faucet, turn the water back on, and see if the leak is gone.
Leaky compression faucets, which have separate hot and cold handles, are common in older homes. They tend to leak when the rubber washer inside wears out.
When to Call a Professional Plumber
While many leaky faucets are simple enough to do yourself, there are times when calling a professional plumber for faucet repair is the best option. If you encounter any of the following issues, it’s time to bring in an expert:
- Persistent Leaks: If the faucet continues to leak after you’ve replaced the parts, there may be an underlying issue that requires professional attention. A licensed plumber can diagnose and fix the problem more effectively, ensuring the leak doesn’t return.
- Complex Repairs: Ball and ceramic disk faucets can be complicated to repair due to their intricate parts. A professional plumber has the experience and tools to handle these repairs efficiently, saving you the hassle of trial and error.
- Water Damage: If a leaky faucet has caused water damage to your sink, countertop, or cabinets, a professional plumber can assess the extent of the damage and recommend necessary repairs. This is crucial to prevent further issues, such as mold growth or structural damage.
Tips for Preventing Future Leaks
- Regular Maintenance: Periodically check your faucets for leaks and replace worn parts, such as O-rings or washers, before they cause more significant issues.
- Avoid Over-Tightening: Avoid using excessive force when turning off your faucet, as this can wear out the seat washer and cause leaks.
- Monitor Water Pressure: High water pressure can stress your faucet’s components, leading to leaks. If your home’s water pressure is too high, consider installing a pressure regulator.
Conclusion
While DIY repairs can be rewarding, professional service guarantees peace of mind and long-lasting results. Don’t hesitate to contact us if you need expert assistance with your leaky faucets or any other plumbing issues.